How To Check Obd1 Ecu Codes
Location
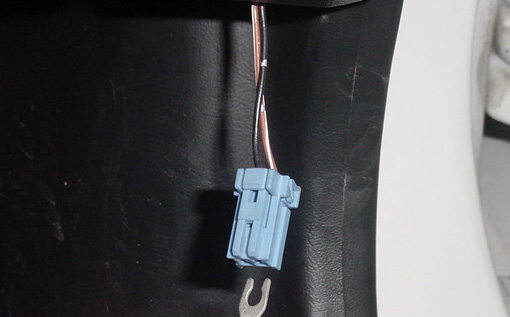
On almost all 1988-2000 Hondas, on the passenger side of your vehicle, under the dashboard and beneath the glove box, you will find a green cover above the kickpanel that houses a blue connector with two wires leading up to it. This is referred to in the service manual as the SCS connector.
Procedure
What you will need to do is turn the ignition to the off position, and using a stripped piece of wire or paperclip, connect both open ends of the blue connector. Once this is performed, turn the key to the IGN position (Second position) and watch your CEL light. It will illuminate in a series of flashes.
Counting the flashes
You will notice that there will be LONG flashes and SHORT flashes. All of the ECU trouble codes will be two-digits. In every case, a long flash will represent the digit 10, simply sum up the long flashes to determine. A short flash will represent the digit 1, simply sum up the short flashes to determine. Sum up the number of 10s and 1s to get the trouble code number.
ie. LONG-LONG-LONG-SHORT-SHORT-SHORT-SHORT-PAUSE
...represents the trouble code: 34
3 LONG flashes followed by 4 short flashes, then a long pause. If that is the only code the ECU is throwing, then the code will simply repeat until you remove the key. If, however there are more than one ECU error code, then you will see a different series of flashes followed by the long pause. Once all the ECU codes have been displayed, they will continuously cycle until you remove the key.
ie. LONG-LONG-SHORT-PAUSE-LONG-LONG-LONG-LONG-SHORT-SHORT-SHORT-PAUSE
...represents the trouble code: 21 and 43
Once you have determined the codes, you can simply remove the paperclip or wire from the connector and replace it back in the green housing.
Fixing the problem
Now that you have the trouble codes, you may proceed to decipher and troubleshoot the issue. You can find more information under the "Trouble Codes" section.